Introduction
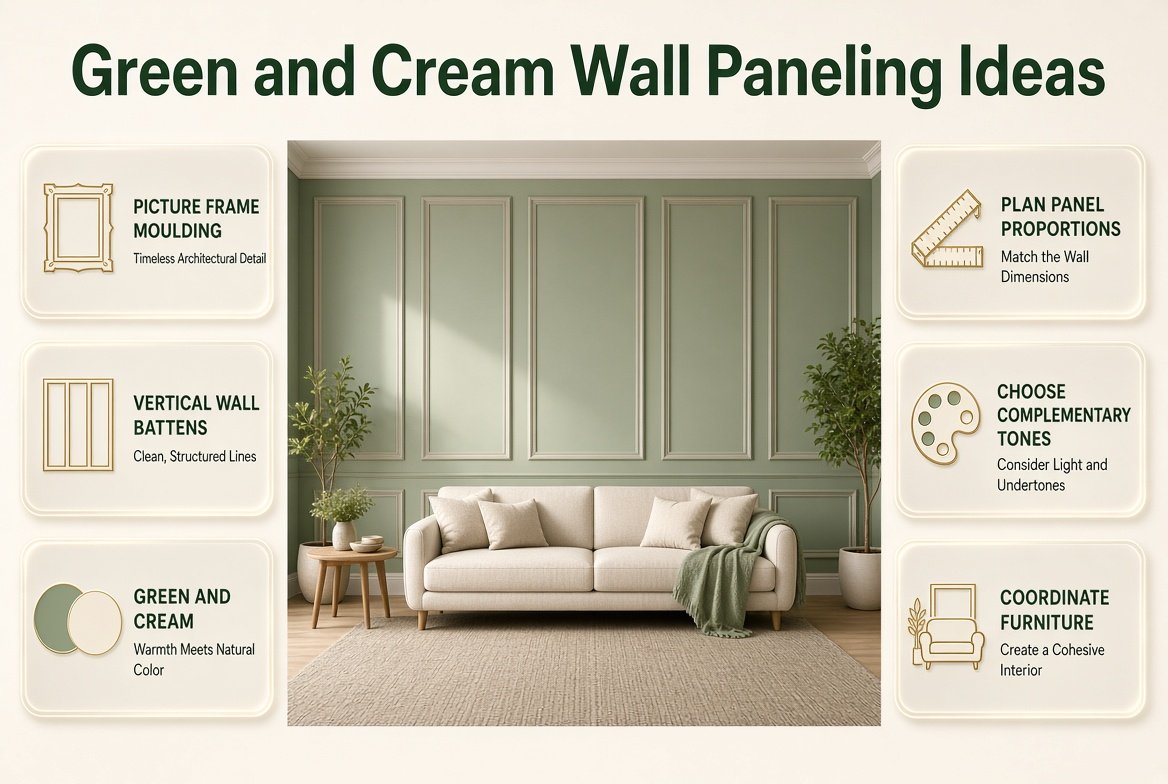
Green and Cream Wall Paneling Ideas | A plain wall can make even a beautifully furnished room feel incomplete. You might have comfortable furniture, attractive flooring, and carefully chosen accessories, yet the space still lacks the architectural detail that makes an interior feel professionally designed. Green and cream wall paneling ideas offer a practical solution by combining the natural character of green with the warmth and versatility of cream.
Whether you’re updating a bedroom, refreshing a living room, or planning a more welcoming dining area, wall paneling can introduce depth, structure, and visual interest without requiring a complete renovation. From classic picture frame moulding to contemporary vertical battens, the right design can complement different room sizes, decorating preferences, and budgets.
The secret is choosing paneling that works with your existing architecture rather than following a design simply because it looks attractive elsewhere. Panel proportions, paint undertones, natural light, and furniture placement all influence the final result.
In this guide, you’ll discover 25 practical green and cream wall paneling ideas, learn how to select suitable materials and paint colors, understand installation considerations, and avoid mistakes that can make a carefully planned wall look unbalanced. You’ll also find styling advice for different rooms and a straightforward process for turning your preferred design into a finished feature.
For more coordinated home inspiration, visit Preppy Room and explore ways to create a consistent look throughout your interior.
What Makes Green and Cream Wall Paneling a Good Design Choice?
Green and cream wall paneling combines decorative wall structure with a balanced color palette. Green introduces depth and a connection to nature, while cream softens the contrast and keeps the room from feeling overly dark or visually heavy.
Paneling also creates shadows and repeating lines that a flat painted wall cannot provide. Even a relatively simple arrangement of battens or rectangular moulding can make a room feel more considered.
Here are the main advantages of this combination:
- Architectural interest: Decorative frames, vertical battens, and raised panels add dimension to plain walls.
- Flexible color combinations: Green can be used as a subtle background or a dramatic focal point, depending on its shade.
- Compatibility with different styles: The palette works with traditional, contemporary, cottage-inspired, transitional, and preppy interiors.
- Better visual organization: Paneling can help define a dining area, highlight a bed, or establish a focal point behind a sofa.
- Straightforward decorating coordination: Cream upholstery, natural wood, muted botanical patterns, and restrained metallic finishes can complement the walls.
However, paneling isn’t automatically the best choice for every wall. A complicated design may compete with existing architectural details, and dark green can make a poorly lit room feel heavier.
The goal is to choose a design that improves the room’s proportions, not simply adds more decoration.
25 Green and Cream Wall Paneling Ideas for Different Interior Styles
1. Classic Sage Green Picture Frame Moulding
Picture frame moulding creates rectangular outlines across a wall, producing a traditional architectural effect without requiring bulky panels.
Paint the wall and moulding in a coordinated sage green for a subtle, continuous appearance, or introduce cream trim to emphasize the rectangular shapes. Both approaches can work, but the choice depends on how much contrast you want.
This design is especially suitable for living rooms, formal bedrooms, and dining areas where traditional details feel appropriate.
To keep the arrangement balanced, calculate the width of each frame before installation. Larger walls generally accommodate broader rectangles, while smaller walls benefit from fewer, more carefully proportioned sections.
Best design approach: Use a muted sage rather than an extremely bright green if you want the moulding to remain elegant and adaptable.
2. Cream Board-and-Batten With Green Upper Walls
Board-and-batten paneling uses vertical boards or narrow strips to create a repeated pattern. It provides noticeable texture without requiring the more elaborate profiles associated with traditional moulding.
Paint the lower wall section cream and the upper wall green. This arrangement creates a clear horizontal division while allowing the upper color to establish the room’s character.
The design works well in hallways, bedrooms, dining rooms, and casual living spaces.
Before installation, determine the panel height, spacing, and relationship to existing windows and doors. The upper edge should feel connected to the room’s proportions rather than positioned arbitrarily.
Professional tip: Test the proposed division with temporary masking tape. Looking at the line from across the room can help you decide whether the proportions feel balanced.
3. Full-Height Green Panels With Cream Borders
Full-height paneling creates a more substantial architectural feature by extending decorative frames from near the baseboard toward the ceiling.
Deep sage, olive, or forest green can work well for the panel interiors, while cream borders provide contrast. This design is particularly effective behind a bed, sofa, or dining table.
It suits rooms where the wall deserves attention and the furniture arrangement allows the paneling to remain visible.
However, full-height dark panels can create considerable visual weight. If your room has limited natural light, consider a lighter green or use the treatment on a single wall.
The most important detail is the layout. Panel widths should relate to the wall’s dimensions, and the design should accommodate switches, outlets, windows, and other architectural features.
4. Half-Wall Green Wainscoting With Cream Above
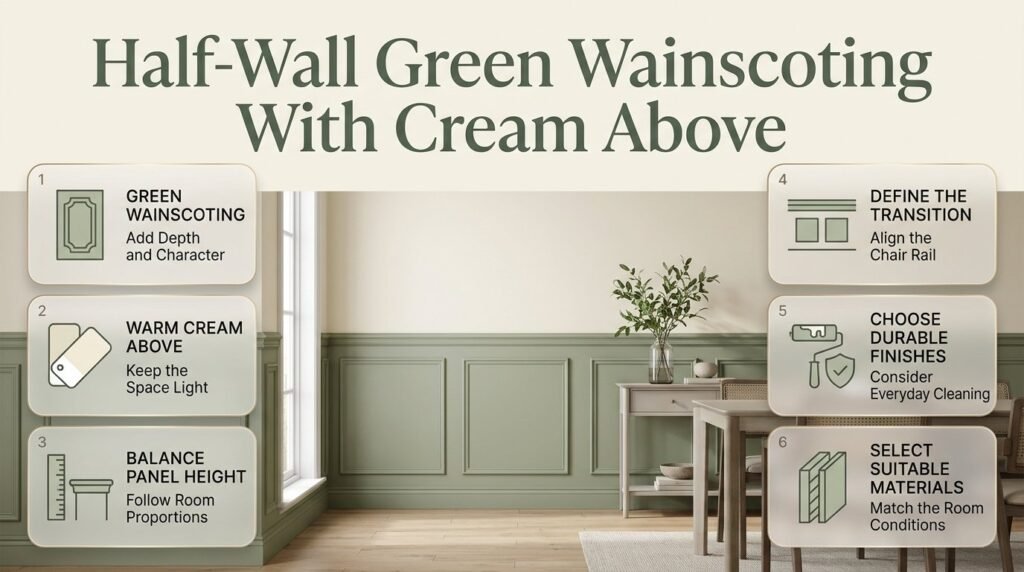
Wainscoting is a wall treatment that generally covers the lower portion of a wall. It can include flat panels, raised frames, board-and-batten, or other decorative profiles.
For a versatile green and cream arrangement, use muted olive or sage on the lower section and warm cream above.
This is particularly useful when you want visible architectural detail without covering the entire wall. It also provides a natural visual boundary in dining rooms and entryways.
Choose the height according to the room’s proportions, existing trim, and furniture. A chair rail, console, or nearby architectural line can help establish a logical stopping point.
For busy family areas, choose a paint finish suitable for regular cleaning and a panel material appropriate for the room’s conditions.
5. Forest Green Raised Panels With Warm Cream Trim
Forest green creates a deeper, more dramatic appearance than sage or pale olive. When combined with warm cream trim, it can make a living room or bedroom feel rich without requiring many additional decorative colors.
Raised panels work particularly well in traditional and transitional interiors because their shadows emphasize the depth of the moulding.
To keep the design balanced, introduce cream through the trim, nearby walls, upholstery, or curtains. Natural wood can also soften the contrast.
This style works best when the room has enough light and the paneling doesn’t compete with several other prominent features.
If your furniture and flooring are already dark, consider using forest green on one focal wall rather than throughout the room.
6. Cream Raised Panels With Green Inset Sections
Instead of making green the dominant color, reverse the arrangement by painting the raised frames cream and the inset sections green.
This creates a decorative appearance with a lighter overall effect. The green sections add depth, while the cream surrounding them keeps the wall from feeling overly strong.
The approach suits guest bedrooms, traditional sitting rooms, and interiors where you prefer a neutral foundation.
It can also help coordinate a room that already contains cream furniture or light-colored flooring.
For the best result, choose a green that complements the cream undertone. A muted olive pairs naturally with warmer cream, while a gray-green may work better with a more neutral shade.
7. Modern Vertical Green Slat Paneling
Vertical slats create a contemporary appearance through repeated narrow lines. They can emphasize the vertical direction of a wall and introduce texture without ornate decorative details.
Use green slats on one feature wall and cream on the surrounding surfaces. This creates a clear focal point while preserving a light overall atmosphere.
The design works well in modern living rooms, home offices, and bedrooms.
Before installation, consider how much space the slats occupy and whether their grooves will be easy to clean. Narrow spacing creates a denser visual pattern, while wider spacing can produce a more restrained effect.
If you choose wood or wood veneer, test its natural tone beside the green paint and cream finish. The materials should look coordinated rather than competing for attention.
8. Minimalist Flat Green Panels With Cream Furniture
Flat panels with subtle divisions offer a clean alternative to decorative moulding.
Choose a muted sage or gray-green and combine it with cream upholstery, simple furniture, and limited accessories. The paneling adds structure without making the room feel overly decorated.
This is a practical choice for contemporary apartments, smaller living rooms, and home offices.
Avoid introducing too many contrasting trim colors or decorative objects. The appeal of minimalist paneling comes from its controlled lines and restrained palette.
If the wall is large, a few well-proportioned panels can create more visual balance than a complicated arrangement of small sections.
9. Green and Cream Paneling Behind the Bed
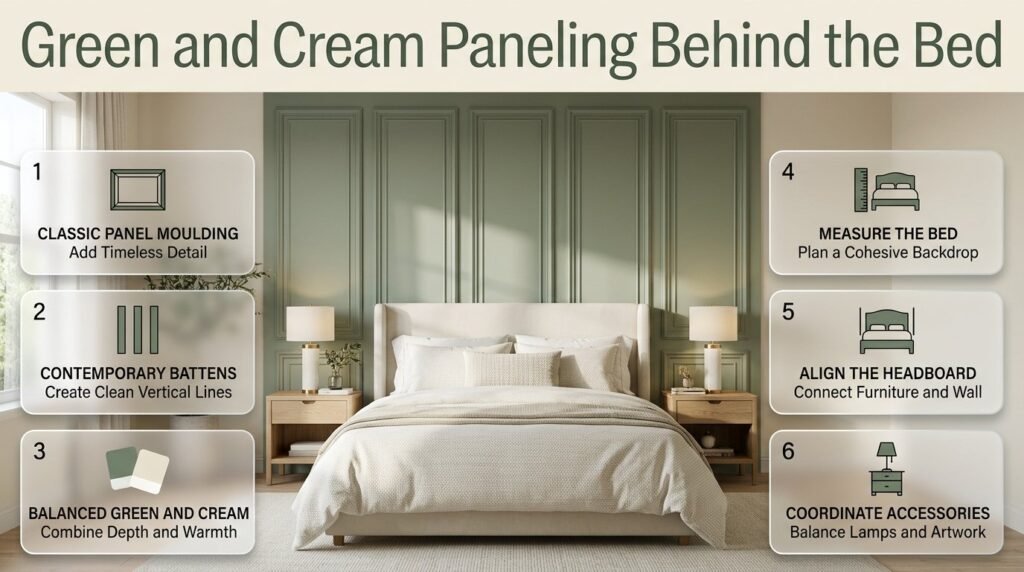
The wall behind the bed is a natural location for decorative paneling because it can frame the headboard and establish the bedroom’s main focal point.
Use sage green panels with cream surrounding walls, or choose cream paneling with green inset details for a softer result.
Traditional rectangular moulding works well in classic bedrooms, while vertical battens or flat panels suit more contemporary spaces.
Measure the bed before planning the design. A feature that is too narrow may look disconnected from the furniture, while a wider arrangement can create a more cohesive backdrop.
Keep bedside lamps, artwork, and other accessories in proportion to the panel layout.
For more bedroom-specific inspiration, explore Green and Cream Guest Bedroom Ideas.
10. Green Paneling Around a Living Room Fireplace
A fireplace often acts as the main focal point in a living room. Paneling can strengthen that visual role by creating a more structured backdrop.
Consider sage green panels with cream trim or a deeper green treatment with lighter surrounding walls. Choose the level of decoration according to the fireplace surround and the room’s existing architecture.
If the fireplace already has elaborate stonework or a decorative mantel, simpler paneling may create a better balance.
Safety is essential when installing materials near a fireplace. Follow the fireplace manufacturer’s clearance requirements and use materials appropriate for the installation. Do not place combustible wood or MDF where the appliance’s specifications prohibit it.
11. Green and Cream Dining Room Wainscoting
Dining rooms often benefit from lower wall paneling because it defines the space without overwhelming the furniture.
Use olive or sage on the lower section and cream above. A wooden dining table, restrained lighting, and upholstered chairs can complete the arrangement.
This treatment is also useful in open-plan interiors because the change in wall finish helps establish a dining zone without introducing a physical partition.
Choose materials and paint finishes that can tolerate the room’s expected wear. Chairs, bags, and regular movement can cause marks along lower walls.
If you want a more formal appearance, add picture frame details. For a casual room, simple board-and-batten may be sufficient.
12. Light Sage Paneling in a Small Entryway
Small entryways can feel unfinished because they often contain little more than a door, a narrow wall, and limited storage.
Light sage paneling can introduce character without requiring dark colors across the entire space. Pair it with cream upper walls, a slim console, and a simple mirror if the layout permits.
Avoid bulky trim and excessively complicated patterns in narrow entrances.
Before installation, check whether the paneling will interfere with door movement, coat hooks, or other practical features.
A durable finish is particularly useful in this area because entryways experience frequent contact from bags, shoes, and everyday movement.
13. Green and Cream Home Office Paneling
A home office can benefit from a paneled wall behind the desk. It gives the workspace a more deliberate appearance and can create a consistent background for video calls.
Muted sage or gray-green works well when paired with cream walls and a simple desk.
Choose paneling with restrained geometry if you use the room for focused work. Complex patterns and strong contrasts can make a small workspace feel visually busy.
Also consider lighting. Highly reflective finishes may create unwanted glare, so test the selected paint sheen before applying it across the entire wall.
Keep shelves and accessories organized to ensure that the paneling remains visible rather than disappearing behind clutter.
14. Cream Panels With Olive Green Battens
This design uses cream as the main wall color and olive green for narrow battens or selected vertical sections.
It offers a subtle alternative to a fully green wall, making it suitable for minimalist interiors and rooms where you want only a small amount of color contrast.
The spacing between battens is important. If the strips are too close together, the wall may look busy. If they are too far apart, the green can appear disconnected.
Draw the layout to scale before installation and check how the pattern relates to furniture, windows, and doors.
15. Sage Green Paneling With Natural Oak Details
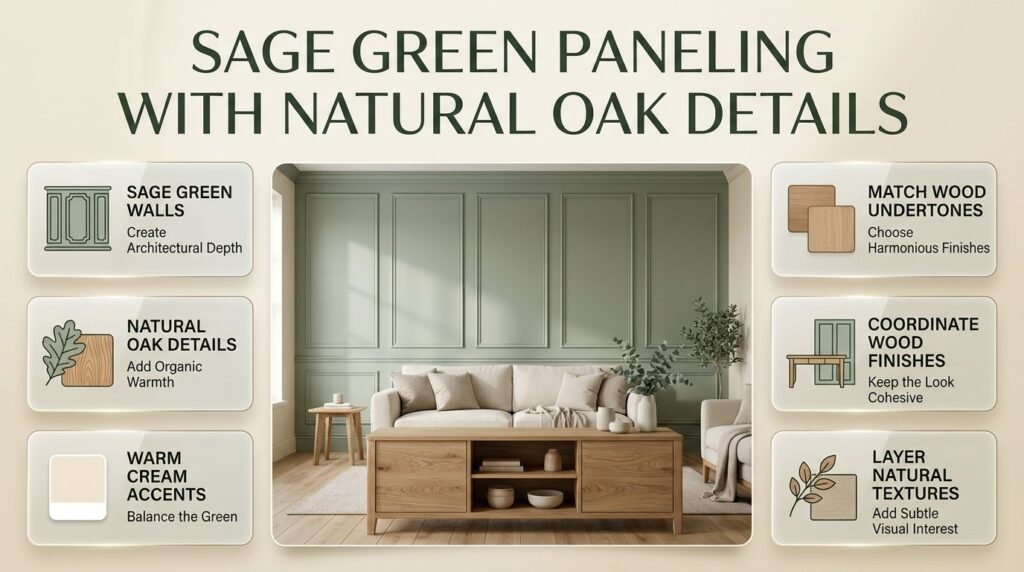
Natural oak and sage green can create a warm, balanced combination, particularly when cream provides the neutral foundation.
Use sage paneling behind a sofa or bed, then introduce oak through a console, bedside tables, flooring, or shelving.
The natural grain adds texture without introducing a competing decorative pattern.
Choose wood finishes with compatible undertones. Warm oak often complements muted greens, while a strongly orange or reddish finish may create a different effect.
You don’t need every wood item to match exactly, but the finishes should feel related rather than randomly assembled.
16. Two-Tone Horizontal Paneling
Horizontal divisions can make a wall feel more structured and are particularly useful when you want to combine green and cream without covering the full surface in one color.
For example, use cream on the upper section and a muted green below a continuous rail.
The horizontal line can relate to furniture height, existing trim, or the architecture of the room.
However, avoid adding too many competing horizontal elements. If the room already has strong lines from windows, shelves, and furniture, keep the paneling simple.
17. Green Geometric Panels With Cream Surrounding Walls
Geometric paneling uses rectangles, squares, or carefully arranged linear sections to create a contemporary feature.
Use a muted green for the panels and cream on adjacent walls. This allows the geometry to remain visible without making the entire room feel busy.
The design works best when the pattern is planned around the wall’s dimensions. Randomly sized sections can look unbalanced unless the arrangement has a deliberate architectural purpose.
Keep nearby artwork and patterned textiles relatively restrained.
18. Cream Paneling With a Deep Green Accent Frame
If you want a small amount of dramatic color, use cream paneling throughout the wall and introduce deep green through one large frame or a selected group of inset sections.
This creates a clear focal point while maintaining a light overall appearance.
It can work particularly well behind a sofa, around a dining area, or on the wall opposite the entrance to a room.
The green section should relate to the furniture below it. A frame that is too narrow or placed awkwardly may look like an isolated decoration rather than part of the architecture.
19. Cottage-Inspired Sage and Cream Paneling
Cottage-inspired interiors often combine painted woodwork, natural materials, and soft colors.
Use sage green on lower paneling and cream above, then introduce natural wood, linen textiles, and a small number of botanical accessories.
This style works well in bedrooms, reading corners, and casual living spaces.
The key is to avoid making every element look deliberately distressed or overly decorative. Clean installation and well-coordinated materials can create a relaxed appearance without sacrificing quality.
20. Traditional Olive Paneling With Antique Cream Trim
Olive green offers a grounded alternative to brighter greens. Paired with antique cream trim, it can complement traditional furniture, warm wood, and classic decorative details.
Picture frame moulding is a natural choice for this arrangement.
Test the cream carefully because antique or yellow-based shades can appear more golden beside olive paint.
Keep the panel proportions generous enough to suit the wall, and coordinate the design with existing door casings and baseboards.
21. Green Paneling With Cream Wallpaper Above
Combining paneling and wallpaper creates two different types of wall texture.
Use green board-and-batten or wainscoting on the lower wall and a cream wallpaper above. A restrained botanical or geometric print can add interest without overwhelming the room.
This approach is useful when you want more pattern than paint alone can provide.
However, the scale of the wallpaper matters. Large, high-contrast prints can compete with narrow battens, while a small, subtle pattern may create a more balanced result.
For additional pattern options, see Green and Cream Wallpaper Ideas.
22. Green Paneling With Cream Built-In Shelving
Built-in shelving and wall paneling can work together when their proportions are planned as a single design.
For example, use green panels behind cream shelves or frame the shelving with green battens. This can create a coordinated backdrop for books and selected decorative objects.
The arrangement is especially useful in home offices, living rooms, and reading corners.
Plan shelf positions before installing the panels so that the shelves do not interrupt the pattern awkwardly.
Also consider how much of the wall will remain visible once the shelving is filled. Detailed paneling may not be necessary behind densely packed shelves.
23. Narrow Vertical Battens for a Modern Bedroom
Narrow battens create repeated vertical lines that can provide a contemporary alternative to traditional rectangular moulding.
Use pale sage or gray-green with cream bedding and simple furniture. The result can feel calm without relying on extensive decoration.
Before installation, check the width of the bed and decide how far the paneling should extend beyond it.
Avoid combining the design with several other strong vertical patterns. Striped curtains or heavily patterned bedding may compete with the wall.
24. Deep Green Lower Panels With Cream Upper Walls
This variation uses a darker green on the lower wall and a light cream above.
It can work in dining rooms, hallways, and traditional living rooms where you want stronger contrast while keeping the upper part of the wall light.
Choose a panel height that suits the room and coordinate it with existing trim.
Because the darker section carries more visual weight, keep the remaining colors relatively simple. Natural wood and neutral textiles can provide enough variation without introducing several competing accents.
25. Full-Room Green and Cream Paneling With Consistent Trim
For a more architectural appearance, carry the paneling around several walls instead of limiting it to one focal point.
This approach can work in formal dining rooms, traditional studies, and bedrooms with suitable proportions.
Use a consistent panel profile and carefully coordinate the green, cream, doors, baseboards, and window trim.
The main challenge is maintaining visual consistency around corners and openings. The design should feel continuous rather than like a series of unrelated wall treatments.
In smaller rooms, consider lighter colors and simpler panels to prevent the repeated pattern from becoming overwhelming.
How Do You Choose the Right Green and Cream Paint Colors?
The best combination depends on undertones, natural light, existing finishes, and the amount of contrast you want.
Sage and warm cream create a gentle, relaxed appearance. Olive and beige cream produce a more earthy atmosphere, while forest green and ivory create a richer, more dramatic effect.
Use this comparison as a starting point.
| Green shade | Cream shade | Overall appearance | Suitable application |
|---|---|---|---|
| Pale sage | Warm ivory | Soft and airy | Small bedrooms |
| Muted sage | Creamy white | Calm and balanced | Living rooms |
| Olive green | Beige cream | Warm and earthy | Dining rooms |
| Forest green | Warm cream | Rich and dramatic | Feature walls |
| Gray-green | Neutral cream | Subtle and modern | Home offices |
| Dusty green | Antique cream | Traditional and gentle | Guest rooms |
How should you test paint colors?
Never choose a wall color solely from a small printed sample or a photograph.
Instead:
- Obtain samples of your preferred green and cream.
- Paint large sample boards or suitable test areas.
- Place them beside the flooring, furniture, curtains, and trim.
- Observe them in daylight and under your evening lighting.
- Check whether either color looks unexpectedly yellow, gray, blue, or dark.
Professional advice: Judge the colors together. A cream that looks neutral on its own may appear yellow beside a cooler green.
If you’re still deciding on the overall palette, explore Green and Cream Wall Color Ideas. That guide can help you narrow the colors before selecting a specific paneling design.
Which Wall Paneling Materials Should You Choose?

The best material depends on the desired finish, budget, wall condition, and installation environment.
| Material | Main benefit | Main consideration |
|---|---|---|
| MDF | Smooth, consistent painted finish | Standard MDF can swell when exposed to moisture |
| Solid wood | Natural grain and character | Can expand or contract with humidity |
| Paint-grade moulding | Flexible decorative layouts | Requires careful measuring and finishing |
| PVC panels | Some products offer moisture resistance | Appearance and installation requirements vary |
| Wood veneer | Natural wood appearance | Needs appropriate care and surface protection |
Is MDF suitable for green and cream paneling?
MDF is commonly used for painted decorative wall treatments because it provides a relatively smooth surface and can accommodate different moulding profiles.
However, standard MDF is not suitable for every environment. Moisture may cause swelling, particularly at cut edges and exposed surfaces.
Choose products rated for the intended conditions, prepare them as directed, and seal the relevant surfaces appropriately.
Is solid wood a better option?
Solid wood offers natural grain and can be repaired or refinished, but its dimensions may change with humidity.
MDF is often convenient when the objective is a consistent painted finish. Solid wood may be more appropriate when visible grain is an important part of the design.
Neither material is automatically superior. The decision depends on the room, appearance, maintenance needs, and installation requirements.
Should you use preassembled panels or individual battens?
Preassembled panels can simplify installation when their dimensions suit the wall. Individual battens provide greater flexibility around doors, windows, and unusual layouts.
Before purchasing, check the thickness, fixing method, preparation requirements, and compatibility with the intended paint.
How Do You Install Green and Cream Wall Paneling?
A professional-looking result starts with accurate measurements and a well-planned layout.
The following process applies broadly to decorative paneling, although the exact method depends on the product and wall condition.
Step 1: Choose the wall and design
Decide whether the paneling will serve as a focal point or continue around the room.
Measure the wall and mark the positions of windows, doors, switches, outlets, and existing trim.
Why it matters: A design that looks balanced in a photograph may not work on your wall if a window interrupts the pattern or furniture covers most of the panels.
Step 2: Sketch the panel layout
Draw the wall to scale and plan the number, width, and spacing of the panels.
Check that the outer sections don’t become awkwardly narrow unless the layout intentionally accommodates the wall’s dimensions.
Common mistake: Choosing the number of panels before calculating their spacing.
Step 3: Confirm the colors and finishes
Test the green and cream samples beside each other and decide whether the trim should match the green or provide contrast.
Also consider the paint sheen. A reflective finish may emphasize surface imperfections, while a lower-sheen finish can create a softer appearance.
Step 4: Prepare the wall
Clean the surface, repair suitable imperfections, and follow the manufacturer’s instructions for preparation and priming.
Identify concealed wiring and plumbing before drilling or cutting. If the wall requires complex repairs or the installation involves uncertain electrical or structural conditions, obtain qualified assistance.
Step 5: Install the panels
Use the installation method specified for the selected material. Depending on the system, this may involve adhesive, mechanical fixings, or both.
Check alignment throughout the process rather than waiting until the entire wall is assembled.
For complex patterns or uneven walls, professional installation may help achieve more consistent results.
Step 6: Finish the joints
Where appropriate, fill nail holes and finish compatible joints according to the material manufacturer’s recommendations.
Sand when required, remove dust, and apply the correct primer before painting.
This stage matters because uneven edges and poorly finished joints become more noticeable once the wall has been painted.
Step 7: Apply paint and inspect the finish
Follow the paint manufacturer’s instructions for application, drying, and recoating.
Inspect the finished wall from different angles and under different lighting conditions. Check for uneven coverage, visible gaps, and inconsistent edges.
Don’t rush the final coat simply to finish the project in one day. Adequate drying time helps protect the finish during everyday use.
How Do You Style Furniture and Decor Around Paneled Walls?
Paneling should work with the furniture and accessories rather than compete with them.
Choose furniture that balances the wall
Cream upholstery can soften a dark green paneled wall, while natural wood adds warmth to a sage and cream scheme.
For example, a sage green bedroom wall can work with cream bedding, an oak bedside table, and simple lamps.
You don’t need to match every accessory to the wall. A few coordinated materials are usually sufficient.
Introduce patterns selectively
Stripes, checks, botanical prints, and subtle geometric designs can complement green and cream interiors.
However, paneling already creates a repeating pattern through its frames and lines. If the wall has elaborate moulding, choose simpler textiles. If the paneling is minimal, patterned curtains or cushions may introduce useful contrast.
Use lighting to reveal texture
Paneling creates shadows that change with the direction and strength of light.
Side lighting may emphasize raised moulding, while softer, more diffuse lighting creates a gentler effect.
Consider the position of wall lights and lamps before installation. Strong lighting can also reveal uneven joints, so careful preparation remains important.
Keep the focal point clear
If the paneling sits behind a bed, avoid overcrowding it with oversized artwork and competing decorations.
If it surrounds a fireplace, allow the fireplace to remain visually important.
For more ways to coordinate wall treatments with the rest of the room, explore Green and Cream Accent Wall Ideas.
What Are the Most Common Green and Cream Paneling Mistakes?
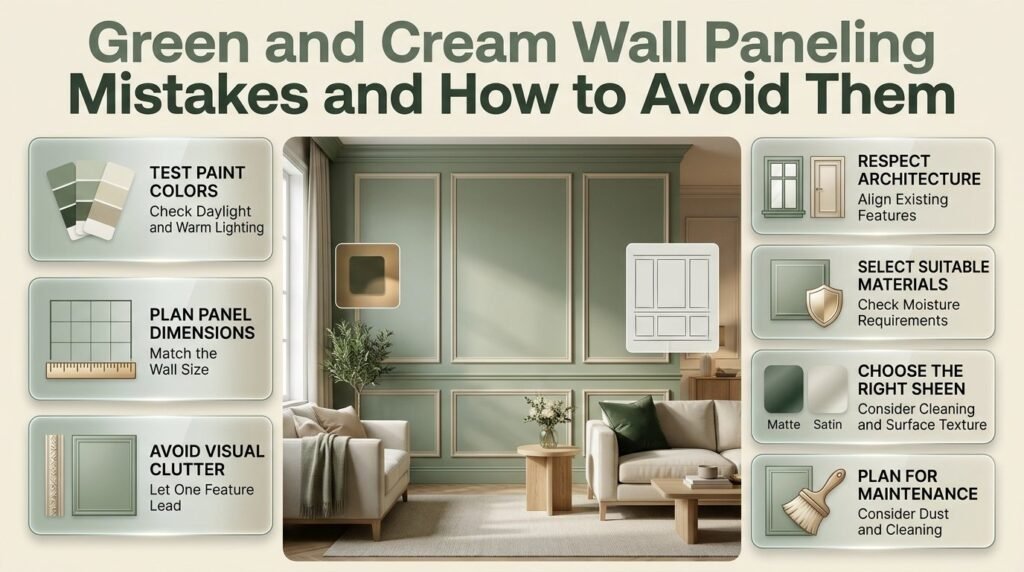
Choosing paint without testing it
Green paint can look different under daylight and warm artificial lighting. A shade that looks soft in a store may appear much darker at home.
How to avoid it: Test large samples in the actual room and review them at different times of day.
Ignoring the room’s proportions
Tiny panels across a large wall can look busy, while oversized rectangles on a narrow wall may appear awkward.
How to avoid it: Sketch the layout to scale and adjust the panel dimensions before installation.
Using too many decorative details
Combining elaborate moulding, busy wallpaper, several contrasting colors, and patterned furniture can make the room feel disjointed.
How to avoid it: Let one feature dominate and simplify the surrounding details.
Ignoring existing architectural features
Paneling that conflicts with window placement, door trim, baseboards, or ceiling height can look like an afterthought.
How to avoid it: Incorporate existing architectural lines into the layout wherever practical.
Selecting unsuitable materials
Materials that cannot tolerate the room’s moisture conditions may swell, separate, or develop finish problems.
How to avoid it: Check product specifications and follow the recommended installation and sealing procedures.
Choosing an impractical finish
A highly reflective paint may emphasize surface imperfections, while a finish that is difficult to clean may be unsuitable for a busy hallway.
How to avoid it: Select the sheen according to the surface, room use, and manufacturer’s guidance.
Forgetting everyday maintenance
Deep grooves and narrow slats can collect dust, while intricate moulding may require more cleaning than flat panels.
How to avoid it: Consider the time and effort needed to maintain the chosen design before installation.
Expert Tips for a More Professional Finish
A polished result usually comes from careful planning rather than expensive materials.
Establish the visual hierarchy. Decide whether the paneling, furniture, fireplace, or artwork should attract the most attention. If the room already contains a prominent feature, use simpler paneling nearby.
Align the design with furniture. Consider the width of the bed, sofa, console, or dining table before finalizing the layout. A panel arrangement that relates to the furniture often feels more intentional.
Keep spacing consistent. Small differences between repeated panels can become noticeable across a large wall. Measure carefully and check the layout before fixing the moulding.
Limit the color palette. Green and cream can provide the main color relationship, while natural wood and restrained metallic accents add variety. Several unrelated accent colors may weaken the overall effect.
Plan for maintenance. Painted paneling needs occasional dusting and cleaning, and it may eventually require touch-ups. Simpler profiles are often easier to maintain than narrow slats or intricate moulding.
Check the finished wall in context. Don’t judge the paneling only from directly in front of it. View it from the doorway and the main seating area to understand how it relates to the room as a whole.
What is the best green and cream wall paneling design for a modern home?
The best design depends on your room size, existing furniture, and preferred interior style. For most modern homes, sage green board-and-batten, minimalist flat panels, and vertical green slats paired with cream walls are versatile choices. These designs introduce architectural detail without making the room feel overly decorated. If you prefer a traditional interior, cream picture frame moulding with muted green panels can create a more classic appearance.
To choose the right design, consider these factors:
For small rooms: Choose light sage green with cream surroundings to maintain a bright, open appearance.
For contemporary interiors: Use flat panels or vertical slats with simple furniture and restrained accessories.
For traditional homes: Consider rectangular picture frame moulding with warm cream trim.
For dramatic feature walls: Use deep forest green with cream borders, especially where natural light is sufficient.
The most successful design is one that complements your home’s existing architecture rather than competing with it.
Which shades of green and cream work best together for wall paneling?
Sage green and warm cream are among the most versatile combinations because they create gentle contrast without making the room feel too dark. However, olive, forest green, and gray-green can also work beautifully when paired with a suitable cream shade. The important consideration is the undertone of each color, as this influences how the combination looks under natural and artificial lighting.
Use these combinations as a starting point:
Sage green and warm ivory: Ideal for bedrooms, guest rooms, and relaxed living spaces.
Olive green and beige cream: Suitable for earthy interiors with wooden furniture and natural materials.
Forest green and creamy white: Creates a dramatic appearance for feature walls and formal living rooms.
Gray-green and neutral cream: Works well in minimalist interiors and contemporary home offices.
Dusty green and antique cream: Complements traditional furniture and classic decorative moulding.
Before painting the entire wall, test both colors together in your actual room. A cream that looks neutral in isolation may appear yellow beside a cooler green. Testing samples at different times of day helps you avoid an expensive color mismatch.
Does green and cream wall paneling work in small bedrooms and living rooms?
Green and cream wall paneling can work very well in small rooms when the design is proportionate to the available space. The key is to control the amount of contrast and decorative detail. Light green shades, cream surroundings, and simple panel patterns can add dimension without making the room feel visually crowded.
For the best results, consider the following recommendations:
Choose lighter colors: Pale sage and warm cream generally create a softer effect than extensive dark green paneling.
Limit complicated patterns: Simple board-and-batten or a few well-spaced rectangular panels can look more balanced than numerous small sections.
Use one focal wall: A paneled wall behind a bed or sofa can provide character without covering every surface.
Coordinate with furniture: Keep the panel layout proportionate to the bed, sofa, or other major furniture.
Plan the lighting: Natural light and well-positioned lamps can help prevent darker green finishes from feeling too heavy.
Avoid assuming that vertical slats automatically make every room appear taller or that cream always makes a space look larger. The final effect depends on the complete arrangement of colors, proportions, lighting, and furnishings.
What is the best material for green and cream wall paneling, and how much maintenance does it need?
The best paneling material depends on your budget, desired appearance, wall condition, and the environment in which it will be installed. MDF is commonly used for painted decorative paneling because it provides a smooth finish, while solid wood offers natural grain and character. Other options, including PVC systems, may be appropriate where specific moisture-resistant properties are needed.
Consider these material differences before making a decision:
MDF paneling: Suitable for many dry interior rooms and painted decorative designs, but standard MDF can swell when exposed to moisture.
Solid wood paneling: Offers natural texture and can be refinished, although it may expand or contract as humidity changes.
Paint-grade moulding: Useful for creating picture frames and decorative borders with a consistent painted appearance.
PVC paneling: Some products offer moisture resistance, but their installation requirements and appearance vary.
Preassembled panels: Can simplify installation when their dimensions and fixing methods suit the wall.
Maintenance usually involves dusting, occasional cleaning, and touching up paint when necessary. Intricate moulding and narrow slats may require more cleaning than flat panels.
Before purchasing, check the manufacturer’s instructions for installation, surface preparation, moisture suitability, and cleaning. Choosing an appropriate material from the beginning helps protect the finish and reduces avoidable maintenance problems.
How can I make green and cream wall paneling look expensive without spending too much?
A refined paneling design depends more on proportions, preparation, and finishing than on expensive materials. Even a straightforward board-and-batten wall can look polished when the spacing is consistent, the paint colors complement each other, and the surrounding decor is carefully coordinated.
Use these practical strategies to achieve a more professional result:
Choose a simple design: Well-proportioned rectangular moulding or evenly spaced battens can look more refined than an unnecessarily complicated pattern.
Measure before buying materials: Sketch the layout and calculate panel spacing to reduce waste and avoid awkward sections.
Test paint samples: Confirm that the green and cream work with your flooring, furniture, and lighting before committing to the full project.
Prepare the surface properly: Clean the wall, repair suitable imperfections, and follow the recommended priming and finishing process.
Coordinate the surrounding decor: Cream upholstery, natural wood, and a few restrained metallic accents can complement the paneling without requiring a complete room makeover.
Pay attention to the details: Clean edges, consistent joints, and a suitable paint finish make a noticeable difference to the final appearance.
If your budget is limited, start with one prominent wall rather than installing paneling throughout the room. A carefully finished focal wall can provide substantial visual impact while keeping material and installation costs under control.
Conclusion
Green and cream wall paneling ideas offer a timeless way to add depth, character, and visual balance to any interior. Whether you prefer elegant board-and-batten, traditional raised panels, modern vertical slats, or simple geometric designs, the right combination can transform an ordinary wall into a thoughtful design feature. Green introduces natural color and personality, while cream keeps the room feeling bright, warm, and welcoming.
The best approach is to choose a paneling style that complements your room’s size, natural lighting, furniture, and overall decorating theme. Deeper greens can create a sophisticated focal point, while sage and muted olive shades provide a softer, more relaxed atmosphere. Cream trim, coordinated textiles, natural wood, and carefully selected lighting help bring the entire space together without making the design feel overwhelming.
Before starting your project, consider your budget, wall dimensions, material requirements, and maintenance needs. A well-planned paneling design does not have to be expensive to look polished. Even a single feature wall can make a noticeable difference when its proportions, colors, and finishes work harmoniously.
For more inspiration, explore Green and Cream Preppy Room Ideas and discover how coordinated colors and decorative details can create a more cohesive interior. With thoughtful planning and the right finishing touches, green and cream wall paneling can deliver a beautiful, practical, and lasting upgrade to your home.