Introduction
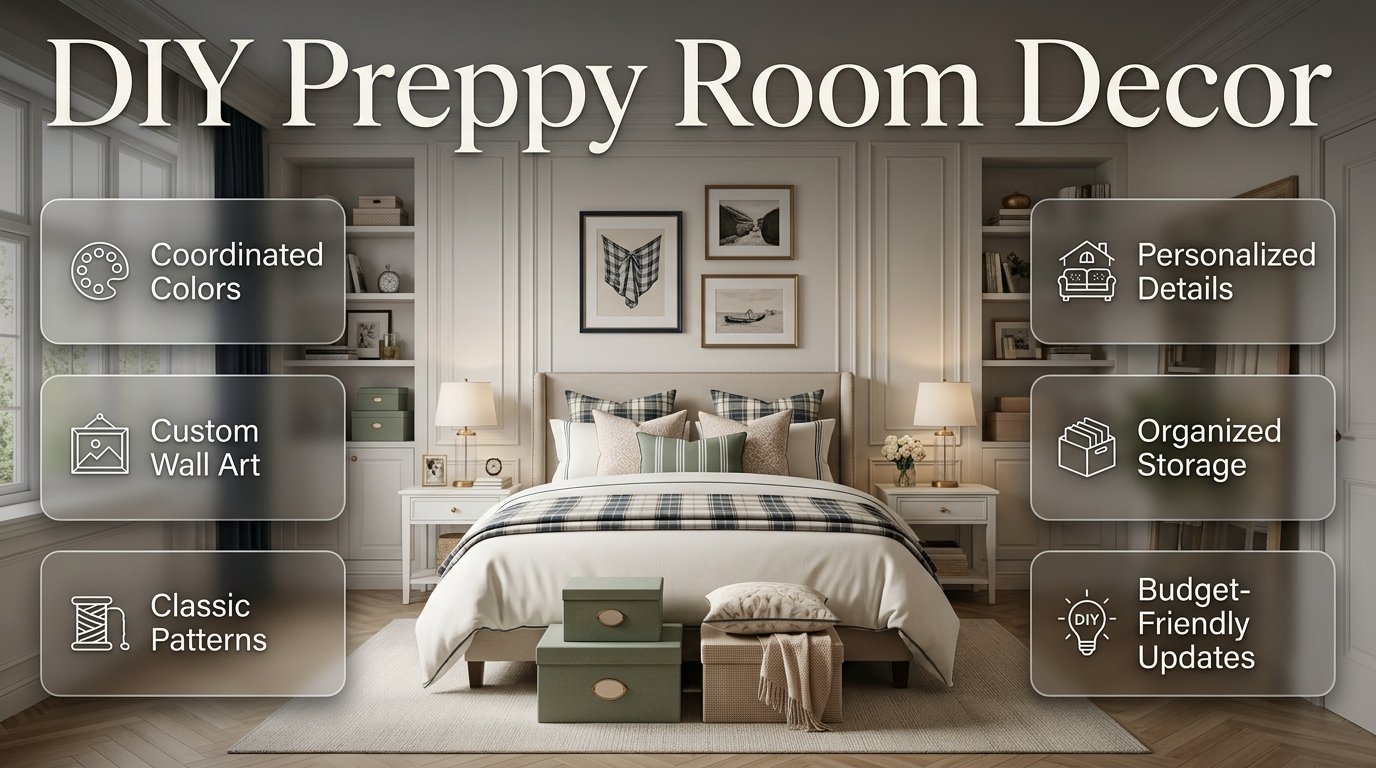
DIY Preppy Room Decor | Creating a stylish room doesn’t always require new furniture, expensive accessories, or a complete makeover. Sometimes, a few thoughtful DIY projects can completely change how a space feels. The challenge is knowing which projects are worth making, how to coordinate them, and how to keep the room looking polished rather than cluttered.
If you’re planning a room makeover, the broader Preppy Room style can give you a useful foundation before you start choosing individual DIY projects. A successful preppy space usually combines classic patterns, coordinated colors, layered textures, organized accessories, and personal details rather than relying on decoration alone.
The best part is that many preppy elements are surprisingly easy to recreate or customize at home. A plain frame can become a statement piece. An inexpensive cushion can introduce the perfect pattern. A simple storage box can become part of the room’s design. Even a blank wall can be transformed with a carefully planned DIY display.
This guide walks through practical DIY preppy room decor ideas for bedrooms, study spaces, small rooms, colorful rooms, and budget makeovers. You’ll learn how to choose a palette, mix patterns, create wall décor, customize furniture and accessories, organize your space, avoid common mistakes, and build a finished room that feels personal and intentional.
What Is DIY Preppy Room Decor?
DIY preppy room decor is the process of creating, customizing, repurposing, or refreshing room decorations yourself while using the recognizable design principles of preppy interiors.
The style commonly uses coordinated colors, classic patterns, tailored details, layered textiles, framed artwork, organized displays, and a mixture of traditional and modern elements.
DIY doesn’t mean every object has to be handmade.
In fact, trying to make everything yourself can sometimes make a room feel less polished. The better approach is to combine purchased essentials with a few customized pieces that give the room personality.
A DIY preppy room might include:
- A handmade gallery wall
- Customized picture frames
- DIY patterned pillows
- A fabric-covered bulletin board
- Painted storage boxes
- Personalized artwork
- A refreshed desk
- Decorative shelving
- A customized lampshade
- A simple accent wall
- Repurposed furniture
- Handmade accessories
The purpose of these projects is not simply to save money. They’re also a way to make the room feel unique.
Why Does DIY Work So Well With Preppy Style?
Preppy interiors are built around repetition and coordination, which makes them particularly suitable for DIY projects.
For example, if your room uses navy, cream, and sage, you can repeat those colors across artwork, pillows, storage boxes, and accessories.
You don’t have to find every item in exactly the right combination.
You can create the connection yourself.
The same principle works with patterns.
If your bedding has a classic stripe, you might introduce a small plaid pattern through a pillow or bulletin board. The patterns don’t have to match exactly. They simply need to share colors and have different visual weights.
That gives the room variety without making it chaotic.
How Do You Plan a DIY Preppy Room Before Starting?
The smartest way to begin is to plan the room before buying supplies.
Look at the space as a whole and decide what is missing.
Is the room too plain?
Does it lack color?
Are the walls empty?
Is storage a problem?
Does the furniture feel disconnected?
Are there too many unrelated accessories?
The answer determines which DIY projects are actually useful.
Start With What You Already Own
Before buying anything, remove unnecessary clutter and look at your existing furniture.
You may already have:
- A suitable desk
- A plain bookshelf
- Neutral bedding
- Basic frames
- Storage containers
- Old cushions
- Wooden furniture
- Decorative objects
- Lamps
- Baskets
Instead of replacing everything, identify which items can be refreshed.
A wooden frame might need only a new finish.
A plain cushion might need a patterned cover.
A boring storage box might need fabric or decorative paper.
This approach is more affordable and usually creates a more personal result.
What Colors Are Best for DIY Preppy Room Decor?
A strong color palette makes DIY decorating much easier because it gives every project a visual connection.
Popular preppy combinations include:
- Navy and cream
- Navy and white
- Sage and cream
- Powder blue and white
- Blush and cream
- Green and white
- Soft blue and beige
- Pink, green, and cream
- Navy, blush, and white
- Forest green, cream, and natural wood
You don’t have to copy one exact combination.
Instead, choose colors that work with your existing furniture and natural lighting.
The Three-Color Method
A simple starting point is:
1 dominant color + 1 neutral + 1 accent
For example:
Navy + cream + sage
The navy creates depth.
Cream prevents the room from becoming too dark.
Sage introduces a softer secondary color.
You can then repeat these colors through your DIY projects.
Why Color Repetition Matters
Imagine a room with:
- Blue bedding
- Pink artwork
- Green pillows
- Yellow storage
- Orange accessories
- Purple curtains
Each item might look attractive individually, but together they can feel disconnected.
Now imagine:
- Navy bedding
- Cream walls
- Sage pillow
- Navy-and-cream artwork
- Natural wood storage
- Small brass-style accents
The second room has fewer colors, but it can feel much more intentional.
How Do You Choose Patterns for a DIY Preppy Room?

Classic preppy patterns include stripes, plaid, gingham, checks, florals, and simple geometric designs.
The key isn’t choosing the “perfect” pattern.
It’s controlling how many patterns compete for attention.
A useful combination is:
1 strong pattern + 1 supporting pattern + solid colors
For example:
Large plaid + narrow stripe + cream solids
Or:
Gingham + small floral + white solids
Different pattern scales help prevent visual competition.
A large plaid can act as the main statement, while a smaller stripe becomes a supporting detail.
DIY Preppy Wall Art
One of the easiest ways to personalize a room is by creating your own artwork.
You don’t need advanced painting skills.
Simple designs can look very effective when they’re properly framed and coordinated with the room.
Try creating:
- Abstract color blocks
- Simple botanical illustrations
- Geometric shapes
- Striped artwork
- Plaid-inspired designs
- Minimal landscape-style artwork
- Simple line art
- Pattern studies
- Decorative initials
- Color studies
The goal is to create artwork that supports the room rather than competes with it.
How to Make DIY Wall Art Look More Professional
Start with a simple design.
Use two or three colors that already appear in the room.
Keep the composition balanced.
Most importantly, don’t underestimate the frame.
A simple homemade print placed in a suitable frame can look much more finished than a complicated painting displayed without structure.
DIY Art Example
Suppose your room uses:
Cream + navy + sage
You could create three pieces:
- Navy geometric artwork
- Cream background with sage botanical shapes
- Simple navy-and-sage stripe design
Place them together in coordinated frames.
The three pieces don’t need to be identical.
They simply need to feel related.
How Do You Make a DIY Gallery Wall?
A gallery wall is another practical project because it allows you to combine handmade artwork with existing photographs, prints, and decorative pieces.
Start by selecting the wall.
Then measure the available area.
Lay your frames on the floor before putting anything on the wall.
This helps you experiment with spacing and arrangement.
A Simple Gallery Wall Formula
Try:
1 large piece + 2 medium pieces + 2–4 smaller pieces
The arrangement can be symmetrical or slightly more relaxed.
For a classic preppy room, symmetrical layouts often work particularly well around a bed or desk.
For a more modern room, an asymmetrical arrangement can create a lighter appearance.
If you want more ideas for building this kind of display, Preppy Room Wall Decor Ideas can help you think about the entire wall rather than treating the gallery as an isolated project.
DIY Picture Frame Makeover
Old or inexpensive frames can become useful decorative pieces.
You can refresh them with:
- Paint
- Decorative trim
- Fabric
- Ribbon
- Metallic-style details
- Layered borders
For a classic preppy room, traditional frame shapes can work beautifully.
For a modern preppy room, simpler rectangular frames may be better.
Try a Coordinated Frame Collection
Instead of making every frame identical, use a related finish.
For example:
- One cream frame
- One navy frame
- One natural wood frame
- One brass-style frame
Then place artwork inside that repeats the room’s colors.
This creates variety without losing cohesion.
DIY Fabric-Covered Bulletin Board
A fabric-covered board is especially useful for a bedroom or study space because it combines decoration with organization.
Choose fabric that fits your palette.
Good options include:
- Gingham
- Plaid
- Stripes
- Small floral prints
- Neutral checks
- Soft geometric patterns
Use the finished board for photographs, notes, cards, schedules, or inspiration.
Why This Project Works
A blank wall can feel unfinished.
A bulletin board fills the space while also giving you somewhere practical to display everyday items.
That makes it more valuable than a decoration that serves no function.
Pro Tip: If the fabric has a strong pattern, keep the surrounding wall décor simpler. Let the bulletin board become the main visual feature.
DIY Preppy Throw Pillows
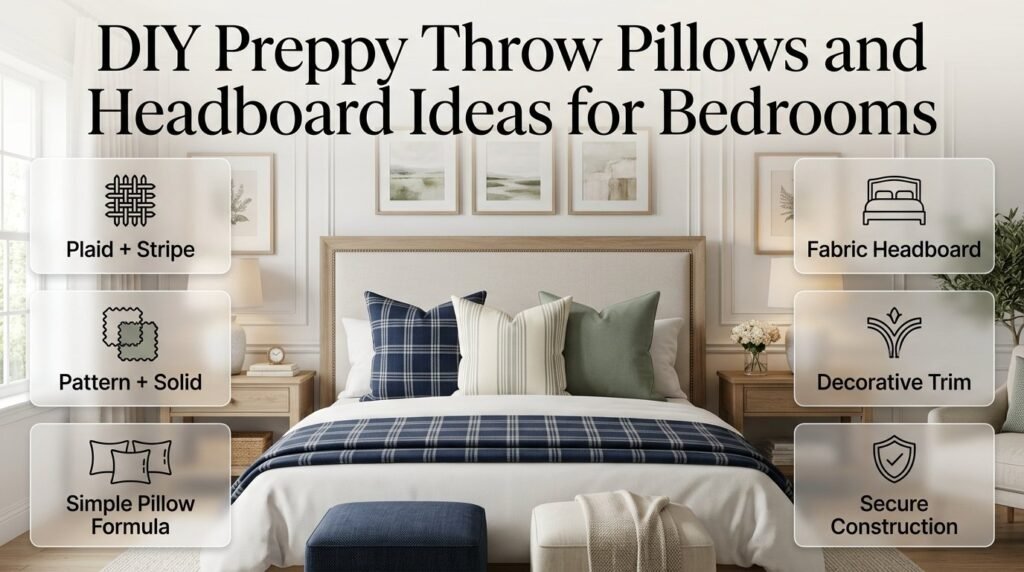
Throw pillows are one of the easiest ways to introduce preppy patterns.
You can make or customize pillow covers using fabrics inspired by:
- Plaid
- Gingham
- Stripes
- Florals
- Checks
- Solid textured fabrics
The most important thing is coordination.
If the bedding already has a bold pattern, choose a simpler DIY pillow.
If the bedding is plain, you can make the pillow more visually interesting.
A Simple Pillow Formula
Try:
1 patterned pillow + 1 striped pillow + 1 solid pillow
For example:
Navy plaid + cream stripe + sage solid
This creates variety without turning the bed into a collection of unrelated patterns.
DIY Headboard Ideas
The headboard often acts as the visual anchor of a bedroom.
If your existing headboard is plain, you can sometimes improve its appearance without replacing it.
Possible ideas include:
- Adding fabric
- Painting a wooden headboard
- Adding decorative trim
- Creating a simple upholstered effect
- Installing removable decorative panels around it
The important consideration is safety and durability.
A DIY headboard should be securely constructed and shouldn’t create sharp edges, unstable parts, or unsafe attachments.
For inspiration on how the bed can become the center of the room, broader Preppy Bedroom Decor Ideas can help connect the headboard with bedding, lighting, artwork, and accessories.
DIY Lampshade Details
A basic lampshade can be customized with subtle trim or a coordinated fabric treatment.
This works particularly well when the lamp itself is plain.
For example:
Cream shade + navy trim
or
White shade + soft green detail
The goal should be subtle.
A lampshade doesn’t need to become the main statement of the room.
Also, never cover ventilation areas or place materials where they could touch a hot bulb. Decorative changes should never interfere with safe operation.
DIY Preppy Storage Boxes
Storage is one of the best places to use DIY skills because you can improve both appearance and organization.
Plain boxes can be covered with:
- Fabric
- Decorative paper
- Paint
- Labels
- Simple trim
You can then use them on shelves, inside wardrobes, or beneath a desk.
What Can You Store?
Try using separate boxes for:
- School supplies
- Small accessories
- Cables
- Stationery
- Keepsakes
- Art materials
- Hair accessories
- Small electronics
Labeling the boxes can make the system easier to maintain.
DIY Desk Organizer
A preppy study space should look organized without feeling sterile.
You can customize small containers for:
- Pens
- Pencils
- Markers
- Notes
- Clips
- Brushes
- Study supplies
Use colors that already exist in the room.
For example:
Cream container + navy detail + natural wood desk
This makes organization part of the room’s décor.
DIY Bookshelf Styling
A bookshelf doesn’t need to be completely filled.
In fact, leaving some open space can make the arrangement look more intentional.
Combine:
- Books
- Framed artwork
- Small plants
- Decorative boxes
- Small objects
- Personal items
Vary the heights.
Place some books vertically and others horizontally.
Then add a small object on top of a horizontal stack.
The result creates visual rhythm.
DIY Accent Wall Ideas
If your room feels plain, a simple accent wall can make a significant difference.
You could use:
- Painted stripes
- Color blocking
- Simple geometric shapes
- Decorative paneling
- Removable wallpaper
- A large DIY art display
You don’t need to decorate every wall.
One carefully planned feature wall is often enough.
Painted Stripes
Vertical stripes can emphasize height visually.
Horizontal stripes can create a different sense of width.
Keep the contrast moderate if the room is already colorful.
A cream wall with soft navy stripes can feel more controlled than several highly contrasting colors.
DIY Wall Paneling Look
Traditional paneling is strongly associated with structured interior design and can support a classic preppy aesthetic.
If permanent construction isn’t appropriate for your room, you can explore removable or lightweight decorative approaches.
The important thing is proportion.
Paneling that is too busy can overwhelm a small room.
Paneling that is too small can look disconnected from the furniture.
Use the furniture beneath or beside the wall as a guide.
DIY Decorative Shelves
Simple shelves can become personalized display areas.
You can customize them through:
- Paint
- Trim
- Decorative brackets
- Coordinated objects
- Fabric backing
Then style them with a mixture of functional and decorative pieces.
Try this sequence:
Tall item → artwork → books → small box → plant
Avoid placing everything at the same height.
Why Empty Space Matters
Empty shelf space isn’t wasted space.
It gives your display room to breathe.
A shelf packed from end to end can make even beautiful objects look messy.
DIY Preppy Room Decor for Small Bedrooms
Small bedrooms require a different approach.
Every DIY project should either improve the appearance or solve a practical problem.
Useful projects include:
- Wall-mounted organizers
- Fabric bulletin boards
- Floating shelves
- Customized storage boxes
- Hanging displays
- Small framed art
- Under-bed organization
- Desk organizers
Avoid oversized decorative pieces that consume valuable floor space.
Use the Walls
When floor space is limited, move your decorative emphasis upward.
A gallery wall, shelf, framed artwork, or bulletin board can create personality without taking away walking space.
DIY Preppy Room Decor for Teens
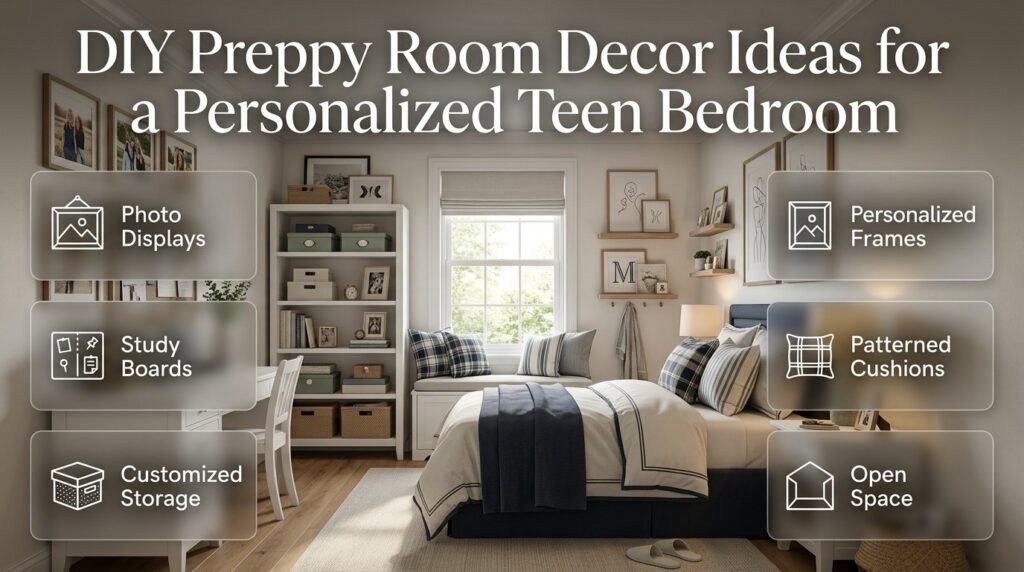
A teen room should feel personal rather than like a showroom.
DIY projects provide a good opportunity to display personality while keeping the main design coordinated.
Useful ideas include:
- Photo displays
- Artwork
- Study boards
- Customized storage
- Patterned cushions
- Small shelves
- Personalized frames
- Keepsake displays
The key is editing.
Personal items should have space around them.
If every surface contains something, even meaningful objects can become difficult to appreciate.
DIY Preppy Decor for a Study Area
A study corner can fit naturally into a preppy room.
Start with the essentials:
- Comfortable desk
- Suitable chair
- Good lighting
- Organized stationery
- Useful storage
Then add personality through:
- Framed artwork
- A DIY bulletin board
- Coordinated storage boxes
- Small plants
- Books
- A simple desk tray
For broader ideas on combining décor, furniture, and styling, Preppy Room Decor Ideas can help you build the overall design around these smaller projects.
How Do You Make DIY Decor Look Expensive?
The secret isn’t using expensive materials.
It’s paying attention to proportion, repetition, and finishing details.
1. Keep the Palette Controlled
Too many colors can make inexpensive items look random.
2. Use Consistent Frames
Frames don’t need to match perfectly, but they should feel related.
3. Hide Clutter
Beautiful décor loses impact when surrounded by unrelated objects.
4. Vary Texture
Combine wood, fabric, woven materials, metal-style details, and smooth surfaces.
5. Leave Negative Space
Don’t fill every shelf, wall, or tabletop.
6. Focus on Finishing
Straight lines, clean edges, properly fitted fabric, and careful placement make DIY work feel more intentional.
DIY vs Buying: What Should You Make Yourself?
Not everything should be DIY.
Some items are better purchased because quality, comfort, safety, or durability matter more.
| Better for DIY | Better to Purchase |
|---|---|
| Artwork | Mattress |
| Picture frames | Main bed |
| Storage boxes | Comfortable chair |
| Pillow covers | Quality rug |
| Bulletin boards | Major lighting |
| Small accessories | Large furniture |
| Shelf styling | Curtains requiring specialist construction |
The best room usually combines both.
DIY provides personality.
Purchased essentials provide reliability and structure.
How Do You Mix Classic and Modern DIY Preppy Decor?
You can create a fresh preppy room by combining traditional patterns with contemporary simplicity.
For example:
Classic: Plaid pillow
Modern: Clean-lined bedside table
Classic: Traditional frame
Modern: Minimal artwork
Classic: Brass-style lamp
Modern: Simple bedding
This prevents the room from feeling locked into one particular era.
How Do You Create a Cute DIY Preppy Room?
A cute preppy room can use softer colors and playful details while maintaining organization.
Consider:
- Blush
- Powder blue
- Sage
- Cream
- Soft pink
- Small floral patterns
- Gingham
- Bows
- Personalized artwork
Keep larger furniture simple.
Then let small accessories provide personality.
This creates a more mature result than covering the entire room in novelty décor.
How Do You Create a Cozy DIY Preppy Room?
Texture is especially important in cozy spaces.
Use:
- Soft throws
- Layered pillows
- Fabric storage
- Woven baskets
- Warm-toned wood
- Comfortable bedding
- Soft lighting
- Small rugs
A cozy room doesn’t need darker colors.
Cream, sage, soft blue, blush, and warm beige can all create a comfortable atmosphere.
How Do You Create a Minimal DIY Preppy Room?
Minimal preppy design requires more editing than decoration.
Choose:
- One main pattern
- Two or three colors
- A few meaningful accessories
- Simple artwork
- Functional storage
- Clean furniture
Avoid making every DIY project visible.
Some of your organization can remain hidden.
The goal is to make every visible item feel intentional.
DIY Preppy Room Decor on a Tight Budget
You don’t need to complete a large makeover in one weekend.
Start with the highest-impact changes.
Budget Priority
1. Declutter
Free.
2. Rearrange furniture
Free.
3. Create artwork
Low cost.
4. Refresh frames
Low cost.
5. Customize storage
Low cost.
6. Add textiles
Moderate cost.
7. Replace major furniture
Higher cost.
This order lets you see how much improvement is possible before spending heavily.
How Do You Repurpose Existing Items?
Repurposing is one of the easiest ways to create unique décor.
Possible examples include:
- Turning an old frame into a display board
- Using small boxes as shelf storage
- Reusing jars as desk organizers
- Refreshing a plain tray
- Painting an old wooden accessory
- Turning unused fabric into pillow covers
- Reorganizing books into decorative stacks
Before throwing something away, ask whether it can serve a different purpose.
Common DIY Preppy Room Mistakes
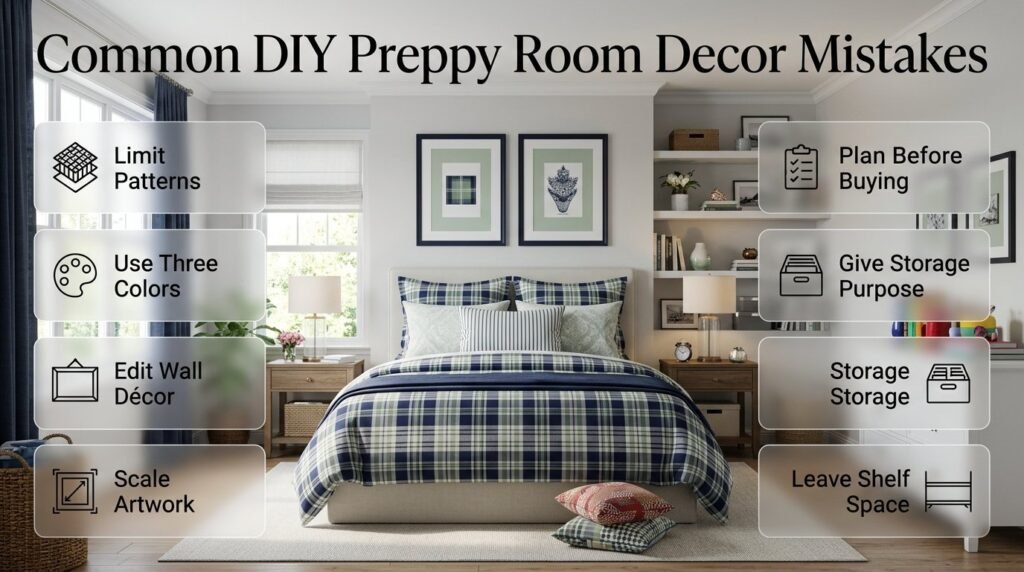
Mistake 1: Making Everything Patterned
Preppy style uses patterns, but that doesn’t mean every surface needs one.
Why it happens: Pattern feels like an easy way to make a room look more decorative.
Why it’s a problem: Too many strong patterns compete for attention.
Better approach: Use one dominant pattern and one or two supporting patterns.
Mistake 2: Using Too Many Colors
Every DIY project can introduce another color.
Eventually the room loses its visual identity.
Better approach: Start with three main colors and repeat them.
Mistake 3: Decorating Every Wall
An empty wall isn’t automatically a problem.
Blank space helps important décor stand out.
Better approach: Choose one or two main wall features.
Mistake 4: Making Projects Too Small
Tiny artwork can disappear above large furniture.
Better approach: Consider the size of the wall and furniture before starting.
Mistake 5: Ignoring Function
A decorative storage box isn’t useful if you don’t know what belongs inside it.
Better approach: Give every storage project a purpose.
Mistake 6: Buying Supplies Before Planning
This can leave you with materials that don’t match the room.
Better approach: Choose the palette and project list first.
Mistake 7: Overcrowding Shelves
Too many small objects create visual noise.
Better approach: Mix objects with empty space.
Expert Tips for DIY Preppy Room Decor
Let One Element Lead
Every room benefits from a focal point.
It might be:
- The bed
- Headboard
- Gallery wall
- Accent wall
- Desk
- Large artwork
Once you’ve chosen it, allow other décor to support it.
Repeat Colors Across Different Materials
Instead of repeating the same object, repeat colors.
For example, navy could appear in:
- Pillow
- Artwork
- Storage label
- Rug
- Book cover
- Frame
This creates cohesion naturally.
Mix Textures
A room can become interesting without adding more colors.
Try:
Cotton + wood + woven material + metal-style accent + soft upholstery
Texture creates depth while keeping the palette controlled.
Use Accessories in Groups
One small object can look lost.
Three related objects often create a stronger display.
Try grouping objects in odd numbers, such as three or five, while varying their heights.
Don’t Copy a Room Exactly
Inspiration is useful, but your room has different:
- Dimensions
- Lighting
- Furniture
- Storage needs
- Personal preferences
Use inspiration as a starting point rather than a strict template.
A Complete DIY Preppy Room Makeover Plan
If you’re ready to transform the room, follow this sequence.
Step 1: Declutter
Remove items that no longer belong in the room.
Step 2: Measure
Measure walls, furniture, and available storage areas.
Step 3: Select Your Palette
Choose your dominant color, neutral, and accent.
Step 4: Choose Your Pattern
Pick one major pattern.
Step 5: Select the Focal Point
Decide whether the bed, wall, artwork, or another feature should lead.
Step 6: Choose Three DIY Projects
Don’t start with ten.
Choose the three that will have the greatest effect.
Step 7: Create Wall Décor
Start with artwork, frames, a gallery wall, or another planned display.
Step 8: Add Textiles
Introduce pillows, throws, or fabric details.
Step 9: Improve Storage
Customize boxes, organizers, or shelves.
Step 10: Style the Room
Add only the accessories that contribute to the overall design.
Step 11: Step Back
Look at the room from the doorway.
This is important because you can often see imbalance more clearly from a distance.
Step 12: Remove One or Two Things
If something feels unnecessary, take it away.
Good decorating isn’t always about adding more.
A Simple DIY Preppy Room Formula
If you’re unsure where to begin, use this formula:
3 colors
1 dominant pattern
1 focal point
2–3 DIY projects
2–4 functional storage solutions
A few personal accessories
This gives you enough structure without making the decorating process overwhelming.
DIY Preppy Room Decor Checklist
Before considering the room finished, check:
- The room has a clear color palette
- The main pattern is easy to identify
- DIY pieces coordinate with existing furniture
- The focal point is clear
- Walls aren’t overcrowded
- Shelves have breathing room
- Storage is practical
- Artwork is properly scaled
- Textures are varied
- Personal items are displayed intentionally
- The room remains comfortable
- DIY projects don’t interfere with everyday use
- Nothing feels added simply to fill empty space
How Do You Make a Preppy Room Look Good on a Budget?
A preppy room can look polished on a budget when you focus on coordination rather than the number of decorations. Start by working with the furniture and accessories you already have, then use affordable DIY projects to introduce classic patterns, layered textures, and a consistent color palette. Instead of replacing major furniture, refresh smaller details such as picture frames, pillow covers, storage boxes, artwork, and desk accessories.
The most effective budget makeovers usually prioritize visible areas first. A well-designed gallery wall, coordinated bedding, or customized storage can have more impact than buying many small decorative items. Choose a few projects that solve an actual design problem and repeat the same colors throughout the room.
Practical points:
Choose two or three main colors before buying materials.
Repaint or customize existing frames and furniture where practical.
Use plaid, stripes, gingham, or subtle floral patterns selectively.
Create your own artwork instead of buying multiple prints.
Repurpose boxes, baskets, jars, and unused accessories.
Spend more carefully on essential items such as comfortable bedding and lighting.
What DIY Projects Work Best for a Preppy Bedroom?
The most useful DIY projects for a preppy bedroom are those that add personality while supporting the room’s existing design. Customized wall art, picture frames, fabric-covered bulletin boards, patterned pillow covers, decorative storage boxes, and shelf makeovers are particularly effective because they can introduce color and pattern without requiring major structural changes.
A good DIY project should also fit the scale of the room. For example, a large bedroom may support a gallery wall, while a smaller room may benefit more from vertical storage or a compact fabric board. The strongest results come from choosing projects that connect with existing bedding, furniture, and wall colors rather than treating every project as a separate design.
Practical points:
Start with wall art if the room feels visually empty.
Use DIY pillows to introduce plaid, stripes, or gingham.
Customize storage boxes when clutter is the main problem.
Refresh plain frames to create a coordinated gallery wall.
Use fabric-covered boards for both decoration and organization.
Match DIY materials to colors already present in the room.
How Do You Mix Patterns in a Preppy Room Without Making It Look Cluttered?
The key to mixing patterns successfully is controlling their scale, color, and visual importance. A preppy room can comfortably include plaid, stripes, gingham, checks, or floral patterns, but they shouldn’t all compete equally for attention. Choose one dominant pattern, then use smaller or quieter patterns as supporting details.
For example, large plaid bedding can become the main pattern while a narrow striped pillow and solid cream accessories provide balance. Repeating one or two colors across different patterns also creates a connection between them. This allows the room to feel layered and interesting without becoming visually overwhelming.
Practical points:
Choose one pattern as the main focal point.
Pair large patterns with smaller-scale designs.
Use solid colors between strong patterns.
Repeat colors instead of repeating identical patterns.
Avoid putting several high-contrast patterns directly beside each other.
Consider the existing rug, curtains, bedding, and artwork before adding another print.
How Can You Make DIY Preppy Room Decor Look More Expensive?
A polished DIY preppy room depends more on execution than on the price of the materials. Clean edges, appropriate proportions, coordinated colors, quality-looking frames, organized surfaces, and thoughtful placement can make inexpensive projects appear much more intentional. The biggest difference usually comes from editing the room after decorating rather than continually adding more pieces.
For example, a simple homemade artwork can look sophisticated when it uses a restrained palette and is displayed in a substantial, well-finished frame. Similarly, inexpensive storage boxes can become part of the décor when they’re covered consistently and arranged neatly on a shelf.
Practical points:
Keep the overall color palette controlled.
Choose DIY projects with clean, simple designs.
Pay attention to the size of artwork in relation to furniture.
Use matching or complementary frames for wall displays.
Mix textures such as wood, fabric, woven materials, and metal-style accents.
Leave deliberate empty space on shelves and walls.
Remove unnecessary decorations once the room is styled.
How Do You Create a DIY Preppy Room That Doesn’t Look Overdecorated?
The easiest way to avoid an overdecorated preppy room is to establish a clear visual hierarchy before adding accessories. Decide what should attract attention first, such as the bed, headboard, gallery wall, or accent wall, and allow the remaining décor to support that focal point. Not every wall, shelf, or tabletop needs a decorative object.
This is especially important with DIY decorating because handmade projects can be tempting to display simply because you’ve created them. Instead, judge each item by its contribution to the room. If a project adds useful storage, introduces an important color, improves an empty wall, or adds meaningful personality, it has a clear purpose. If it simply fills space, it may not be necessary.
Practical points:
Select one main focal point for the room.
Limit strong patterns to areas where they have visual impact.
Keep some wall and shelf space intentionally empty.
Combine decorative pieces with functional storage.
Avoid displaying every DIY project you’ve made.
Step back and view the room from the doorway before adding anything else.
Remove pieces that compete with the room’s main design rather than supporting it.
Conclusion
Creating a beautiful preppy room doesn’t require an expensive makeover or a room full of new decorations. The most effective approach is to work with what you already have and use DIY projects to add thoughtful color, pattern, texture, personality, and organization. Simple updates such as customized artwork, refreshed picture frames, patterned pillows, fabric boards, decorative storage, and styled shelves can make an ordinary room feel much more intentional.
The key is consistency. Choose a manageable color palette, select one or two patterns that define the room, and make sure your DIY pieces connect naturally with the furniture and accessories already in the space. At the same time, leave enough open space so the room feels comfortable rather than overcrowded.
Most importantly, choose DIY projects for a reason. A useful storage box, personalized artwork, or practical display can contribute far more to the room than several unrelated decorations. Start with one area, make a few meaningful improvements, and build from there.
With thoughtful planning and a little creativity, DIY preppy room decor can give you a room that feels stylish, organized, personal, and genuinely your own.